
MouseAir Version 2.0
Here are a few pictures of MouseAir Version 2, a project built with a Raspberry Pi. I’m still working on the mechanical parts, but the box is designed and printed. I’m getting quite good at 3D printing and designing with OpenSCAD. I’ve learned a few tricks regarding printing complex designs that I will pass on in a few days.
First a closeup of the MouseAir Version 2.0 box, sans Cat.

Here is a picture of the Version 2.0 box compared to MouseAir Version 1.0. Much simpler, better design. The block diagram of Version 1.0 is here and the block diagram of Version 2.0 is here. Of course, no MouseAir posting is complete without a look at the MouseAir Version 1.0 prototype launching a mouse.

Mechanics of MouseAir Version 2.0
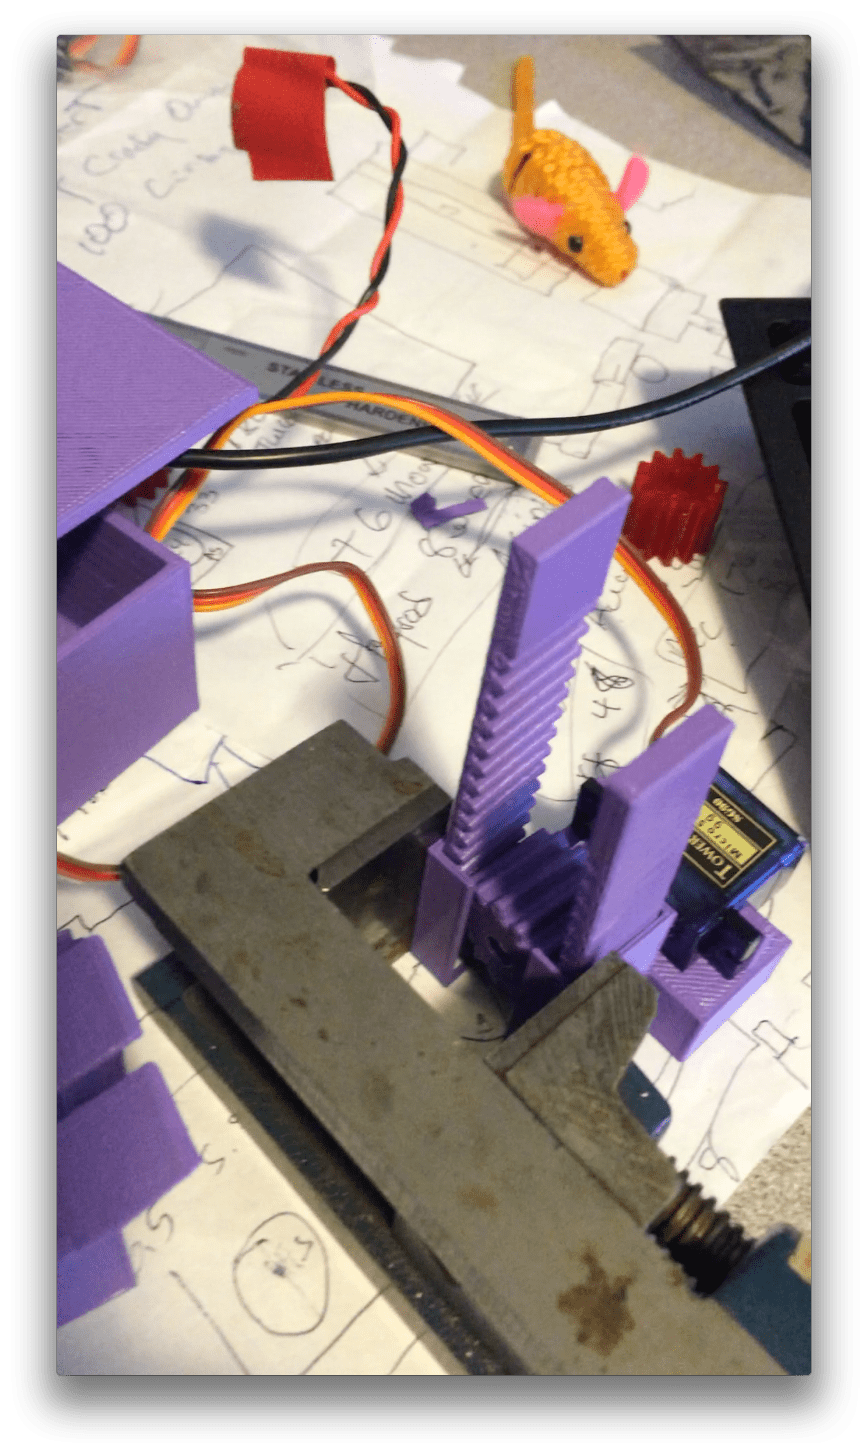
I’m using two servo motors to control the loading of the mouse and then propelling the mouse into the spinning motors. Both are built on 3D printed Rack and Pinion. More on that next week. Here is a picture of the loading gear, racks and servo.
Arduino versus Raspberry Pi
I gave quite a bit of thought to replacing the Raspberry Pi with an Arduino (which has superior built-in IO for servo motors, etc.) but decided that it is the higher level functions and ability to add-on software features that make the Raspberry better for this application. The control panel for both would be the same since RasPiConnect also works with the Arduino With the Raspberry Pi, you can add Bluetooth, more internet connectivity, more graphs, image processing, etc., etc. more easily than in the Arduino. The price is about the same until you start adding features and functions. The whole point of MouseAir is to provide an open platform upon which to build additional sensors.

2 Trackbacks / Pingbacks
Comments are closed.